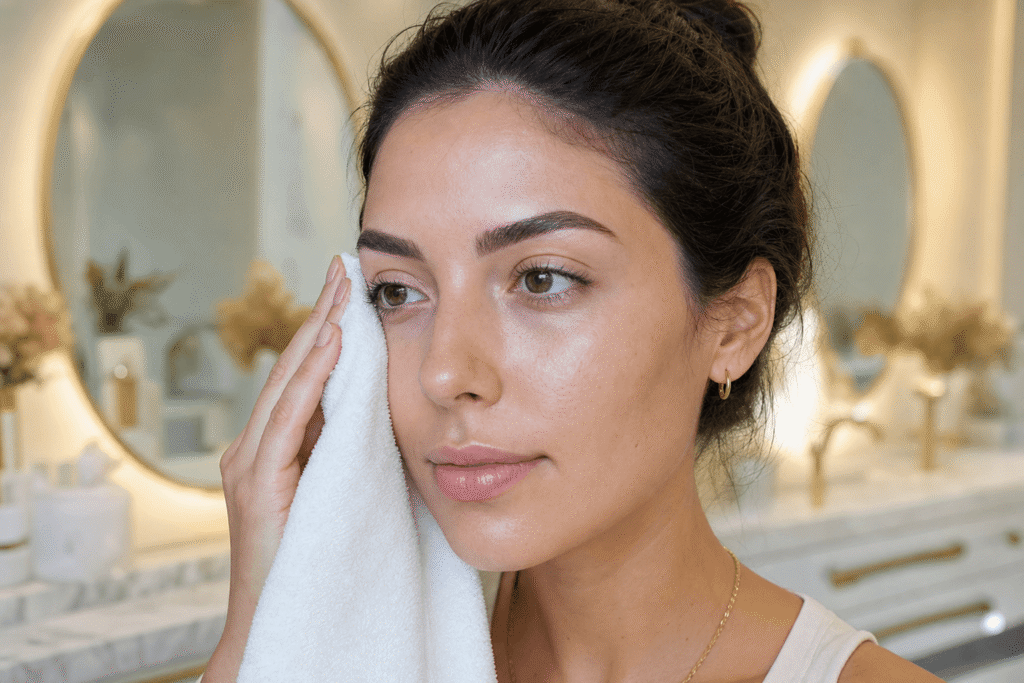
Yes, you can wash your face after microblading, but you must keep the treated eyebrow area completely dry for the first 10 to 14 days. This critical healing period determines how well your pigment retains and how natural your final results look. Washing your face requires careful technique to avoid water contact with your newly microbladed brows.
Understanding proper face washing protocols after microblading makes the difference between beautifully healed brows and patchy, faded results. This guide covers exactly when you can wash your face, step-by-step techniques for each healing stage, what happens if your eyebrows accidentally get wet, and how to shower safely during recovery.
At Fantasy Beauty in Mont-Royal, Leila Ghadyani has guided thousands of clients through successful microblading recovery over her 10+ years of PMU experience. The aftercare instructions you follow in those first two weeks directly impact your final results and how long your microblading lasts.
Quick Answer
You can wash your face immediately after microblading, but you must avoid getting your eyebrows wet for 10 to 14 days. Use a gentle cleanser on the rest of your face, carefully avoiding the brow area, and pat dry with a clean towel.
Key Takeaways
- Avoid getting microbladed brows wet for 10 to 14 days after treatment.
- Wash your face immediately after microblading using careful avoidance techniques around brows.
- Pat dry gently; never rub towels across healing eyebrow area during recovery.
- Expect pigment to appear darker initially, then fade 30-40% during healing process.
- Book touch-up appointments 6-8 weeks post-treatment for optimal pigment retention results.
When Can I Wash My Face After Microblading? Complete Timeline
The microblading healing timeline dictates when and how you can safely wash your face. Each stage of recovery requires different levels of caution around water exposure. Following this timeline prevents pigment loss and infection while keeping the rest of your face clean.
Your skin begins healing immediately after your microblading appointment. The tiny hair-like incisions start forming protective scabs within hours. Any water contact during this vulnerable period can soften scabs prematurely, pull out pigment, and compromise your final results.
| Timeline | Washing Method | Precautions |
|---|---|---|
| Day 1 (4+ hours post-treatment) | Gentle cleanser on face, avoid brow area | Tilt head back, use lukewarm water only |
| Days 2-7 | Barrier method or micellar water | Work quickly to minimize steam exposure |
| Days 8-14 | Gentle cleanser with protective barrier | Let flaking scabs fall naturally, never pick |
| Day 14+ | Resume normal face washing gradually | Use only gentle, fragrance-free products |
You can wash your face the same day you receive microblading, starting about four hours after your appointment. This allows initial lymph fluid to dry and form the beginning of protective scabbing. Use lukewarm water and a mild, fragrance-free cleanser on your forehead, cheeks, nose, and chin. Keep your head tilted back slightly to prevent water from running toward your eyebrows.
Days 2 through 14 represent the most important window for microblading aftercare. Your face washing technique during this period directly impacts pigment retention. Continue washing your face twice daily using the avoidance method. By day 10, most scabbing has flaked away naturally. You can gradually resume normal face washing around day 14.
In our Montreal studio, we see many clients struggle with face washing during Quebec’s humid summers. The moisture in the air softens scabs faster, making water avoidance even more critical. Use micellar water on a cotton pad for areas near your brows instead of traditional washing during high-humidity weeks.
How to Properly Wash Your Face After Microblading Without Damaging Your Brows
Proper face washing technique after microblading requires precision and patience. The goal is thorough facial cleansing while maintaining a completely dry eyebrow zone. This approach prevents water-related pigment loss while keeping your complexion clear during recovery.
Step-by-Step Face Washing Technique for Each Healing Stage
Days 1-3 (Initial Healing): Fill your sink with lukewarm water. Dampen a clean washcloth and apply a small amount of gentle cleanser. Wring out excess water thoroughly. Clean your face in sections, starting farthest from your eyebrows. Cleanse your chin and jawline first, then cheeks, then nose. For your forehead, hold a dry towel across your eyebrows as a barrier while you gently wipe above them.
Days 4-7 (Peak Scabbing): Your eyebrows will feel tight and possibly itchy. Switch to micellar water on cotton pads for the entire upper half of your face. This no-rinse approach eliminates splash risk entirely during the most vulnerable healing stage. Apply micellar water to a fresh cotton pad for each area: one for each cheek, one for your nose, one for your chin, and one for your forehead above your brows.
Days 8-14 (Flaking Phase): As scabs begin naturally flaking away, you can return to gentle cleanser use. Continue the barrier method with a dry towel across your brows. Work quickly to minimize steam exposure, which can soften remaining scabs. Never scrub or rub healing skin. Pat gently with flat fingers rather than wiping motions.
Recommended Products for Safe Cleansing
Choose fragrance-free, sulfate-free cleansers with a pH between 5.0 and 6.0 during your recovery period. Specific brands that meet these criteria include Cetaphil Gentle Skin Cleanser, CeraVe Hydrating Facial Cleanser, and La Roche-Posay Toleriane Hydrating Gentle Cleanser. These formulations cleanse effectively without stripping natural oils or irritating healing skin.
For micellar water, Bioderma Sensibio H2O, Garnier SkinActive Micellar Cleansing Water (pink cap), and Simple Kind to Skin Micellar Cleansing Water work well during peak healing days. Keep a large bottle on hand and use it liberally during days 4-10 when scabbing is heaviest.
Face Washing Tips for Different Skin Types During Recovery
Oily skin types should wash twice daily using an oil-free cleanser like Neutrogena Oil-Free Acne Wash (pink grapefruit) on areas away from brows. Use blotting papers throughout the day to absorb excess oil without disturbing healing eyebrows. Dry skin types need lightweight moisturizers like Clinique Dramatically Different Hydrating Jelly applied carefully to avoid the eyebrow zone, stopping at least one inch away from the brow perimeter. Combination skin requires a sectioned approach, using oil-controlling products on your T-zone away from brows and richer moisturizers on dry cheek areas.
Ready to book your treatment?
Visit Leila Ghadyani at our Mont-Royal studio for a personalized consultation and expert permanent makeup treatment.
How to Shower After Microblading Without Getting Your Eyebrows Wet
Showering after microblading requires more planning than daily face washing. Steam, water pressure, and extended exposure time all increase the risk of accidental eyebrow wetting. Strategic shower techniques protect your investment while maintaining personal hygiene.
Take showers instead of baths during your recovery period. Keep shower sessions under five minutes for the first 10 days after microblading. Use the backward leaning method by tilting your head back so your face angles toward the ceiling throughout your shower. This position prevents water from running down your forehead toward your eyebrows.
For the shower shield technique, hold a clean, dry washcloth across your eyebrows while showering. Press it gently against your forehead, creating a waterproof barrier. Some clients find a visor or shower cap positioned low on the forehead helpful. Keep water temperature lukewarm to cool during your entire recovery period. Hot showers produce excessive steam that penetrates even the best protective techniques. After showering, gently pat your face dry with a clean paper towel.
Clients often underestimate steam exposure. At Fantasy Beauty, we recommend turning off the shower and stepping out while your hair conditioner processes. Those three to five minutes of steam-free conditioning time significantly reduce moisture exposure to healing brows without extending your total shower time.
What Happens If My Eyebrows Get Wet After Microblading?
Accidental water exposure happens despite careful precautions. Understanding what occurs when healing microblading gets wet helps you respond appropriately and minimize damage. Quick action limits pigment loss and healing complications.
Water softens the protective scabs forming over your microblading incisions. These scabs seal in pigment and protect against infection. When scabs soften prematurely, they can detach before the skin underneath fully heals, taking embedded pigment with them.
Immediate Response to Water Exposure
If a single drop hits your eyebrow, blot it immediately with a clean tissue using gentle pressing motions. Do not wipe or rub. The faster you remove moisture, the less scab softening occurs. If your eyebrows get significantly wet, pat them dry immediately using a clean paper towel or tissue. Use gentle pressing motions only. After blotting dry, allow your eyebrows to air dry completely for 10 minutes. Once fully air-dried, apply a thin layer of the healing ointment your microblading artist provided.
Common Accidental Water Exposure Scenarios and Damage Control
Shower Accident: If water runs down your forehead during showering, immediately step out of the water stream. Tilt your head forward to prevent more water from reaching your brows. Pat dry with a clean towel using pressing motions. Wait 15 minutes for complete air drying before reapplying healing ointment. For the remainder of your healing period, consider showering with a waterproof bandage strip placed horizontally above your brows as an extra barrier.
Rain Exposure: Unexpected rain poses a challenge when you are outside during healing. If caught in rain, shield your forehead with your hand or bag immediately. Find shelter as quickly as possible. Once protected, use a tissue to blot any moisture from your brow area. Avoid rubbing. If your brows become thoroughly soaked, follow the full drying protocol and apply ointment once home.
Sweat During Heat or Exercise: If you forget exercise restrictions and sweat reaches your eyebrows, stop activity immediately. Blot your forehead and brow area with a clean tissue before sweat can saturate the healing skin. The salt content in sweat is particularly damaging to pigment retention. Apply a thin layer of healing ointment after the area dries completely. Avoid further exercise until day 10 minimum.
Face Washing Splash: When water accidentally splashes onto your brows during careful face washing, stop immediately. Blot the wet area with a tissue. Let it air dry for 10 minutes. Continue your face washing routine with even more caution, using smaller amounts of water and working more slowly.
Pigment Loss Expectations
Minor water exposure typically causes localized pigment fading in the affected area. You might notice slight patchiness or lighter color in spots that got wet. This unevenness gets addressed during your touch-up appointment. Repeated water exposure causes cumulative damage and increases total pigment loss. Contact your microblading artist if you experience significant water exposure. At Fantasy Beauty, Leila Ghadyani provides all clients with direct contact information for aftercare questions. Most minor water incidents do not require drastic intervention, but consistent problems need professional guidance.
Understanding the Microblading Healing Timeline: What to Expect
The microblading healing process unfolds in predictable stages. Knowing what to expect each week prevents panic when normal changes occur. This timeline helps you distinguish between typical healing progression and signs requiring professional attention.
Every client heals slightly differently based on age, skin type, immune function, and adherence to aftercare. The timeline below represents typical progression for most clients.
| Healing Stage | Timeframe | What to Expect | Care Focus |
|---|---|---|---|
| Immediate Post-Treatment | Day 1 | Brows appear very dark and bold; slight redness and tenderness | Keep completely dry; apply thin ointment layer |
| Initial Healing | Days 2-4 | Color darkens further; light lymph fluid may appear; slight swelling | Maintain dryness; continue gentle ointment application |
| Heavy Scabbing | Days 5-8 | Thick scabs form; intense itching begins; brows feel tight and rough | Resist scratching; never pick at scabs |
| Major Flaking | Days 9-12 | Scabs begin peeling naturally; color appears patchy and too light | Let flakes fall naturally; avoid pulling loose pieces |
| Post-Scab Healing | Days 13-21 | Most scabs gone; skin looks healed but color seems faded | Gradually resume normal face washing and skincare |
| True Color Emergence | Days 22-42 | Pigment oxidizes to final shade; true color becomes visible | Assess results; prepare for touch-up appointment |
Days 1-4: The Darkening Phase – Your eyebrows will look significantly darker and bolder than your desired final result immediately after microblading. This dramatic appearance stems from oxidized pigment sitting on the skin surface combined with the actual implanted color. Do not panic about the intensity. During these first days, you might notice a shiny appearance from the healing ointment and lymph fluid.
Days 5-8: The Itching Phase – Intense itching signals active healing as your skin regenerates beneath forming scabs. Distract yourself when itching peaks. Apply a cold compress to your forehead near your brows, but not directly on them. Keep your hands busy with fidget toys or stress balls during high-temptation moments.
Days 9-14: The Patchy Panic Phase – As scabs naturally detach, your eyebrows will look alarmingly patchy and faded. Many clients panic during this stage, believing their microblading failed. In reality, this uneven appearance represents a normal mid-healing state, not your final result. The pigment appears lighter because a new layer of healed skin now covers it.
Days 15-28: The True Color Reveal – Around day 15, your eyebrows transition from looking too light to gradually revealing their true retained color. By day 28, you will see approximately 60-70% of your final result. Most clients need touch-ups to perfect their microblading. Plan to complete your full microblading process, including the touch-up, before judging final results.
Microblading Aftercare Dos and Don’ts During Healing
Comprehensive aftercare extends beyond water avoidance. Multiple factors influence microblading healing and final results. Following all aftercare guidelines ensures optimal pigment retention and prevents complications that could require corrective work.
The first 14 days after microblading determine approximately 70% of your final result quality. Proper aftercare during this window maximizes your investment and minimizes the correction needed at your touch-up appointment.
Essential Dos for Optimal Healing
Keep brows completely dry: No water, sweat, or steam contact for 10-14 days. Moisture softens scabs and pulls out pigment before proper healing occurs.
Sleep on your back: Avoid face-down sleeping positions that create pressure and fabric friction against healing brows. Use clean pillowcases and change them every two days to prevent bacterial contact.
Apply thin ointment layers as directed: Use only the amount specified by your artist, typically a rice-grain size for both brows. Apply 2-3 times daily or as instructed. Excess ointment suffocates skin and can draw out pigment.
Let scabs flake naturally: Never pick, scratch, or peel scabs. Premature removal causes scarring and significant pigment loss. Allow pieces to fall off on their own timeline.
Avoid makeup on brows for 14 days: Skip brow pencils, powders, gels, and any products that touch the healing area. Makeup introduces bacteria and prevents proper healing.
Stay out of direct sun: UV exposure fades pigment rapidly and causes uneven color development. Wear a hat when outdoors and avoid tanning beds completely during healing.
Skip workouts for 10 days: Postpone exercise, especially intense cardio that produces sweat. Salt in perspiration pulls pigment from incisions. Light walking is acceptable, but nothing that raises your heart rate significantly.
Critical Don’ts That Damage Results
Do not expose brows to water, sweat, or steam: This includes swimming pools, hot tubs, saunas, steam rooms, and facial steaming. Even humidity-rich environments can compromise healing.
Do not sleep face-down: Pressure against pillows disrupts scab formation and can cause uneven pigment retention across your brows.
Do not over-apply ointment: Thick layers prevent oxygen from reaching healing skin, which slows recovery and can create a breeding environment for bacteria.
Do not pick or scratch: Touching healing brows with fingers transfers bacteria and can cause infection. Scratching removes scabs prematurely, creating gaps in pigment coverage.
Do not use active skincare ingredients: Pause all retinols, glycolic acid, salicylic acid, vitamin C serums, and chemical exfoliants on your entire face for 14 days. These increase cell turnover which interferes with pigment settling.
Do not get Botox or facials: Wait at least four weeks after microblading before receiving any facial treatments, Botox injections near the brow area, or professional extractions.
| Do | Don’t | Why It Matters |
|---|---|---|
| Keep brows completely dry | Expose brows to water, sweat, or steam | Moisture softens scabs and pulls out pigment |
| Sleep on your back | Sleep face-down on your pillow | Pressure and fabric friction disrupt healing |
| Apply thin ointment layers as directed | Over-apply thick ointment layers | Excess ointment suffocates skin and draws out pigment |
| Let scabs flake naturally | Pick, scratch, or peel scabs | Premature scab removal causes scarring and pigment loss |
| Avoid makeup on brows for 14 days | Apply brow pencils, powders, or gels | Makeup introduces bacteria and prevents proper healing |
| Stay out of direct sun | Tan, use tanning beds, or skip SPF | UV exposure fades pigment and causes uneven color |
| Skip workouts for 10 days | Exercise, especially intense cardio | Sweat contains salt that pulls pigment from incisions |
Montreal Climate Considerations for Microblading Aftercare
Montreal’s distinct seasonal weather patterns create unique challenges for microblading aftercare. Understanding how local climate affects healing helps you adjust your care routine for optimal results throughout the year.
Winter Healing Challenges
Quebec winters bring harsh cold and aggressive indoor heating that impact microblading recovery. When you enter a warm building from freezing outdoor air, your skin temperature rises rapidly, increasing blood flow to the surface. This sudden circulation boost can cause more oozing lymph fluid during early healing stages.
Keep your thermostat moderate, ideally around 20-21 degrees Celsius, during your recovery period. Avoid standing near heating vents or radiators, which create localized hot zones that increase facial sweating. Indoor heating also creates extremely dry air that can make scabs more brittle and prone to cracking. Use a humidifier in your bedroom to maintain 40-50% humidity, but position it away from your face to avoid direct moisture exposure to your brows. Apply healing ointment slightly more frequently in winter, approximately every 4-5 hours instead of twice daily, to prevent excessive dryness.
Cold outdoor air can make your nose run, creating moisture that threatens your eyebrow area. Carry tissues and blot your nose frequently to prevent liquid from traveling upward toward your brows. Wind chill also dries skin aggressively. Wear a loose hat that covers your forehead without touching your eyebrows directly. A winter headband positioned across your forehead provides wind protection while avoiding direct brow contact.
Summer Healing Factors
Montreal’s humid summers create the opposite challenge. Excess environmental moisture softens scabs more readily, making water avoidance even more critical. High humidity percentages above 70% can penetrate your healing brows even without direct water contact.
Stay in air-conditioned spaces as much as possible during the first 10 days. If you must go outside during summer healing, limit exposure to early morning before 9am or evening after 7pm when temperatures are cooler and humidity levels drop. Dab your forehead frequently with a clean tissue before sweat can run toward your eyebrows.
Summer rainstorms arrive suddenly in Montreal. Check weather forecasts before leaving home during your healing period. Carry a small umbrella at all times. If caught unexpectedly in rain, shield your forehead immediately with your hand, bag, or any available cover. Sweat becomes a significant concern during hot weather. Even walking from your car to a building can produce perspiration. Clients often underestimate how quickly sweat impacts healing. Blot your forehead every few minutes when outdoors in summer heat.
Spring and Fall Optimal Timing
Many PMU artists consider spring and fall the ideal seasons for microblading in Montreal. Moderate temperatures between 15-22 degrees Celsius reduce climate-related healing complications. Less extreme weather means fewer adjustments to your aftercare routine.
Spring months of May and June offer comfortable healing conditions before summer humidity peaks. Fall months of September and October provide similar benefits after summer heat subsides but before winter dryness arrives. If you have flexibility in scheduling, consider booking your appointment during these optimal windows for the most straightforward healing experience. Temperature stability during these seasons means your indoor heating or air conditioning runs less frequently, creating more consistent humidity levels that support steady healing without the extreme adjustments required in winter or summer.
Frequently Asked Questions
Can I wash my face the same day I get microblading done?
Yes, you can wash your face the same day, but wait at least four hours after your appointment. Use a gentle cleanser on areas away from your eyebrows, keeping the treated area completely dry. Tilt your head back while washing to prevent water from running toward your brows.
How do I wash my face after microblading without getting my eyebrows wet?
Use the barrier method by holding a dry washcloth across your eyebrows while cleansing the rest of your face. Work in sections starting farthest from your brows. Alternatively, use micellar water on cotton pads for no-rinse cleansing during peak healing days.
What happens if my eyebrows accidentally get wet after microblading?
Immediately blot them dry using gentle pressing motions with a clean tissue. Let the area air dry completely for 10 minutes before applying healing ointment. Minor water exposure typically causes localized pigment fading that can be corrected at your touch-up appointment.
When can I apply facial cleanser directly to my eyebrow area?
Wait until day 14 after your microblading appointment before applying facial cleanser directly to your eyebrow area. Even after day 14, use only gentle, fragrance-free cleansers and avoid scrubbing. Resume normal eyebrow cleansing gradually.
How do I know when my microbladed eyebrows are fully healed?
Your microbladed eyebrows are fully healed when all scabbing and flaking have stopped, the skin texture feels normal and smooth, and the color has settled into its final shade. This complete healing typically takes 28-42 days.
Final Thoughts on Face Washing After Microblading
Proper face washing after microblading determines the difference between beautifully healed, long-lasting results and patchy, faded brows requiring extensive correction. The 14-day healing window demands careful water avoidance, gentle cleansing technique, and patience as your skin progresses through normal healing stages.
At Fantasy Beauty in Mont-Royal, Leila Ghadyani combines her 10+ years of PMU expertise with personalized aftercare guidance tailored to Montreal’s climate challenges. Her clients consistently achieve optimal pigment retention because they receive detailed, practical instructions for every healing stage.
Ready to achieve perfectly shaped, natural-looking eyebrows with expert guidance through the entire healing process? Book your microblading consultation at Fantasy Beauty today. Leila Ghadyani will assess your unique features, discuss your brow goals, and provide the comprehensive aftercare support that ensures beautiful, lasting results.